|
Shortening an Interlocking Slide Fastener To shorten an interlocking slide fastener, first determine the length required. The chain should be about one-half inch shorter than the opening in the material or garment. Mark the desired length, measuring from the bottom stop upward. Open the chain to any point below this mark and cut directly across the tape about 1 inch above the mark. Cut the excess teeth from the marking point to the end of the tape, and replace the two stops, crimping them firmly. Installing an Interlocking Slide Fastener The installation of an interlocking slide fastener varies with the type of job. Some are curved, some have rounded comers, and some are hidden. The installation of a straight slide fastener is described in the following paragraphs. Slide Fastener Presser Foot To install a slide fastener neatly and easily, you should use a slide fastener presser foot on the sewing machine. The slide fastener presser foot serves not only as a guide for a neat row of stitches, but also prevents the foot from riding up on the chain. The sewing machine manufacturer can supply a regular slide fastener presser foot (right or left) for any sewing machine, or one can be made locally. File or grind the left side of an old presser foot to permit sewing to within 1/8 inch of the chain. Fabrication When sewing, always stretch the slide fastener and not the material, as this makes a flatter and neater job.

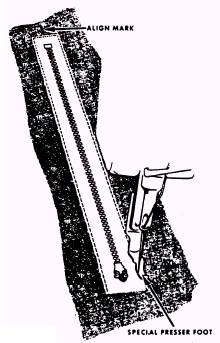
Figure 10-22.-Installation of a slide fastener. Step 1. When making a bag or cover with two closed ends, lay the piece of material right side down, and place the slide fastener right side down on top of the material where the opening is to be located. Sew a row of stitches completely around the outer edge of the tape, as shown in figure 10-22. Turn the material over. Then by feeling with the points of a pair of scissors, cut the material directly down the center of the chain and cut a V at each end, as shown in figure 10-23. Turn the edges of the material under, thus exposing the chain. Allow sufficient space between the chain and the folded edge of the material to prevent the slider from rubbing the edge of the hems. Cutting the V at each end of the chain permits the sewing of neat, square corners. (See figure 10-24.)
|

