|
||
|
|
||
| |||||||||||||||
|
|
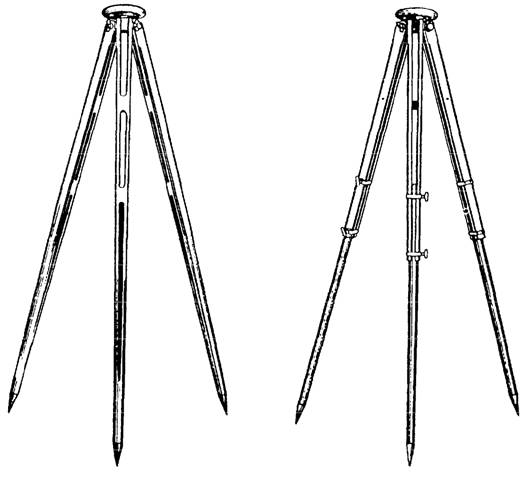
CHAPTER 5 LEVELING AND GRADING This chapter describes the common types of leveling instruments. It also describes their principles, uses, procedures of establishing elevations, and techniques of laying outbuilding lines. As a Builder, you will find the information especially useful in performing such duties as setting up a level, reading a leveling rod, interpreting and setting grade stakes, and setting batterboards. Also included in this chapter are practices and measures that help prevent slides and cave-ins at excavation sites, and the procedures for computing volume of land mass. LEVELS LEARNING OBJECTIVE. Upon completing this section, you should be able to describe the types of leveling instruments and their uses. The engineer's level, often referred to as the "dumpy level," is the instrument most commonly used to attain the level line of sight required for differential leveling (defined later). The dumpy level and the self-leveling level can be mounted for use on a tripod, usually with adjustable legs (figure 5-1).
Figure 5-1.-Tripods. Mounting is done by engaging threads at the base of the instrument (called the footplate) with the threaded head on the tripod. These levels are the ones most frequently used in ordinary leveling projects. For rough leveling, the hand level is used. DUMPY LEVEL Figure 5-2 shows a dumpy level and its nomenclature. Notice that the telescope is rigidly fixed to the supporting frame. Inside the telescope there is a ring, or diaphragm, known as the reticle, which supports the cross hairs. The cross hairs are brought into exact focus by manipulating the knurled eyepiece focusing ring near the eyepiece, or the eyepiece itself on some models. If the cross hairs get out of horizontal adjustment, they can be made horizontal again by slackening the reticle adjusting screws and turning the screws in the appropriate direction. This adjustment should be performed only by trained personnel. The object to which you are sighting, regardless of shape, is called a target. The target is brought into clear focus by manipulating the focusing knob shown on top of the telescope. The telescope can be rotated only horizontally, but, before it can be rotated, the azimuth clamp must be released. After training the telescope as nearly on the target as you can, tighten the azimuth clamp. You then bring the vertical cross hair into exact alignment on the target by rotating the azimuth tangent screw. The level vial, leveling head, leveling screws, and footplate are all used to adjust the instrument to a perfectly level line of sight once it is mounted on the tripod. |
|
Privacy Statement - Press Release - Copyright Information. - Contact Us - Support Integrated Publishing |