| Tweet |

Custom Search
|
|
 
|
||
|
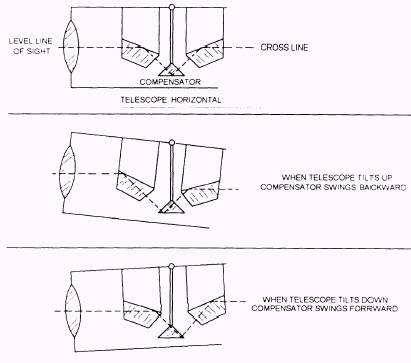
DUMPY LEVEL The dumpy level (fig. 15-39) has its telescope rigidly attached to the level bar, which supports an adjustable, highly sensitive level vial. The cross hairs are brought into focus by rotation of the eyepiece and the focusing knob. The telescope can be exactly trained on the level rod by lightly tightening the azimuth clamp and manipulating the azimuth tangent screw. Depending on atmospheric conditions, the dumpy level can be used to measure vertical distances accurately at distances of 300 feet or less. When used for alignment, it is accurate at distances up to 1,000 feet. SELF-LEVELING LEVEL The self-leveling level (fig. 15-40) is a precise, time-saving leveling instrument and is equipped with a small bull' s-eye level and three leveling screws. The leveling screws, which are on a triangular foot plate, are used to center the bubble of the bull' s-eye level. The line of sight automatically becomes horizontal and remains horizontal as long as the bubble remains approximately centered. A prismatic
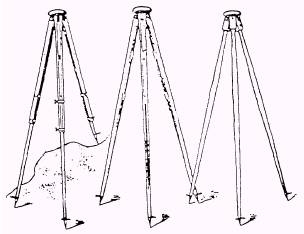
Figure 15-40.-Self-leveling level. 15-23 device, called a compensator (fig. 15-41), makes this possible. The compensator is suspended on fine, nonmagnetic wires. The action of gravity on the compensator causes the optical system to swing into the position that defines a horizontal line of sight. This horizontal line of sight is maintained despite a slight out-of-level telescope or even a slight disturbance occurs on the instrument. TRIPOD The tripod (fig. 15-42) is the base or foundation that supports the level instrument and keeps it stable during observations. A tripod consists of a head to which the instrument is attached, three wooden or metal legs that are hinged at the head, and pointed metal shoes on each leg to be pressed or anchored into the ground to achieve a firm setup. In setting up the tripod, loosen the restraining strap from around the three legs. An effective way to set the tripod down is to grip it with two of the legs close to your body while you stand over the point where the setup is required. By using one hand, push the third leg out away from your body until it is about 50 to 60 degrees with the horizontal. Lower the tripod until the third leg is on the ground. Place one hand on each of the first two legs, and spread them while taking a short backward step, using the third leg as a pivot point. When the two legs look about as far away from the mark as the third one and all three are equally spaced, lower the two legs and press them into the
Figure 15-42.-Tripods.
Figure 15-41.-Self-leveling level compensator. 15-24 ground. Make any slight adjustments to level the head further by moving the third leg a few inches in or out before pressing it into the ground. When placing the instrument onto the tripod, grip the instrument firmly to avoid dropping it while you are mounting it on the tripod. The instrument should be screwed down to a firm bearing, but not so tightly that it binds or the screw threads strip. |
 
|
|
|
||