Custom Search
|
|
 
|
||
|
There are many factors that affect exposure times in the enlarging process. Some of these factors are as follows: The light source and illumination system of the enlarger The f/stop of the lens The density of the negative The degree of enlargement The speed of the paper The density and color of the contrast printing filter The best way for you to determine the correct enlarging exposure is by making a test strip. Although the test strip is the most reliable way to determine exposure, you do not need a test strip for every enlargement. It is, however, a wise practice whenever you are in doubt as to the exact exposure required. A test strip for enlarging is made the same way as for contact printing. When making the enlargement test strip, you must try to select the proper printing filter based on negative contrast. Once the printing filter has been determined, set the enlarger for producing the desired size prints. Set the lens f/stop at f/5.6 or f/8, for example. Next, examine the projected image on the focusing paper in the easel and estimate the amount of exposure time you think the print requires. From experience, you estimate the correct exposure time to be about 15 seconds. Because your estimate may be incorrect, a logical procedure is to expose a test strip in four sections. To make the actual test strip, you must do the following: 1. Place one test strip on the easel in a position to sample the highlights, midtones, and shadows. 2. Cover three quarters of the strip with opaque paper or cardboard and expose the uncovered section for 5 seconds. 3. Move the cardboard to cover one half of the strip and give another 5 seconds of exposure. 4. Again move the cardboard-this time to expose three quarters of the strip-and provide 5 seconds of exposure. 5. Now uncover the entire strip and expose it for another 5 seconds. This produces a strip with exposures of 5, 10, 15, and 20 seconds. 6. Process the test strip the same as contact prints. 7. Examine the processed test strip under white light and select the segment representing the exposure that gave the best results. If a time between two sections gives the best result, make another test at the estimated time. When you have selected the exposure, you are ready to make a full-size print-if the contrast is correct. If not, change filters and make another test strip. The primary purpose for a test print is to determine the correct exposure, but it can also help you determine the correct contrast or printing filter to use. When the test print is too contrasty or too flat, make another test print with a higher or lower number of contrast printing filter. When printing, contrast (the difference in tonal value between the highlights and shadows) is as important for you to determine as is the correct exposure. Almost all Navy imaging facilities use variable contrast printing papers. To control contrast with this type of paper, you must use variable contrast printing filters. Unlike film, increasing the development time of paper does not increase the contrast significantly. In fact, when paper development is carried out much beyond the recommended time, contrast can actually decrease due to fogging. Likewise, short development times should not be used in an attempt to get lower contrast. The result Table 11-2. Multigrade Filter Selection Guide
of short paper development times is usually a print that is not fully developed, and the print has poor tone quality and a muddy appearance. Variable contrast printing filters are the only practical way of altering print contrast with variable contrast papers. Variable contrast papers have orthochromatic sensitivity. The blue light-sensitive part of the emulsion controls high contrast, and the green light-sensitive part controls low contrast. By using the proper variable contrast filter between the light source and the paper, you can control the contrast. Variable contrast filters range from yellow (low contrast) through deep magenta (high contrast). When making test strips to determine correct exposure, you also need to determine the contrast. You do this by examining the shadow area of the test strip that has the correct highlight exposure. When the shadow area of this test is too light, the test does not have enough contrast. When the test does not have enough contrast, a higher number filter is required. When the shadow area is too dark, the test has too much contrast and a lower number filter is required. Table 11-2 is based on using Ilford Multigrade filters and Ilford Multigrade papers. Ilford Multigrade filters are available in the following 12 grades: 00, 0, 1/2, 1, 1 1/2, 2.2 1/2, 3, 3 1/2,4,4 1/2, and 5. Use this table as a guide to help you determine the correct filter. The principles, also, apply to the use of filters not shown in the table, such as 0, 1, 1 1/2, 2 1/2, 3, 3 1/2, or 4 1/2. Figure 11-10 shows the difference in contrast obtained from one negative using different contrast printing filters. When using variable contrast paper and filters, you must remember the following: The filters should be clean and in good condition (not scratched, etc.). Like all filters, they fade and must be replaced. The density of filters changes with the different numbers. Filter numbers 0 - 3 1/2 require a one f/stop increase of exposure compared to the exposure when no filter is used. Filter numbers 4 - 5 require a one f/stop increase compared to the exposure when a 1 - 3 1/2 filter is used, or a two f/stop increase of exposure compared to the exposure when no filter is used. For example, when you make a test print with an exposure of f/8 at 10 seconds with a No. 3 contrast printing filter, and then make another test print with a No. 4 contrast printing filter, your new exposure will be f/5.6 at 10 seconds. It is possible to control local contrast by changing filters. For example, one possibility is for you to print an overall exposure with a No. 2 filter while holding back or dodging the sky and then burning in the sky with a No. 1 filter. When printing with more than one filter, you should work from a full test print to determine the best approach. Study the manufacturer's directions so you can use their filter and paper combination to best advantage. Many of us are guilty of throwing away the manufacturer's directions that come with photographic materials. By maintaining them in a reference book, you have a tremendous source of information available that can save time and materials. Having determined the correct exposure and contrast, you are now ready to produce the production prints. Until you become proficient in printing, make test prints for each negative you print. By adjusting the lens f/stop, you may use longer or shorter exposure times than the test exposure time determined previously, providing they do not become excessive in either direction. Very short exposures are not practical. Very long exposures subject the negative to excessive heat from the printing lamp and also waste time. Five seconds is the minimum amount of exposure time that you should use. Twenty seconds is about the longest exposure time required for normal negatives. A standard procedure is to change the exposure by varying the f/stop of the lens to bring the exposure time within practical limits.
PHC Carl Hinkle Figure 11-10. Comparison of a number 0, 2, and 5 contrast printing filter.
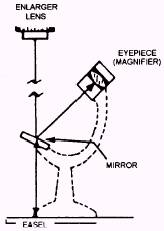
Figure 11-11. Grain focuser. |
 |
|
|
||