Custom Search
|
|
 
|
||
|
Once You have set the compass to the exact radius
of the circle, handle it very carefully so that you
dont disturb the setting. Set the needlepoint at
the center of the circle and carefully rotate the
compass to draw a line describing the circumference
of the circle. Do not apply too much
pressure on the needlepoint or it will bore a
hole in the paper and you will lose the accurate center
mark. To keep the diameter of the hole to a
minimum, you may set the needlepoint of the compass
on a small strip of paper or thin cardboard
over the drafting sheet at the center of the
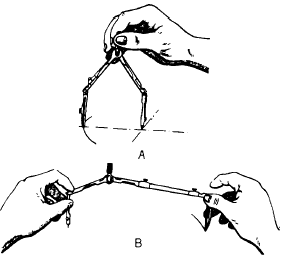
circle. When you are using the pencil leg to draw circles smaller than 1 in. in radius, keep the adjustable pencil and needle legs straight. For larger circles, both legs should be adjusted so that they are perpendicular to the paper. On the other hand, when you are using the compass with the pen leg, you MUST adjust it at the hinge joint to keep it perpendicular to the paper for all size
Figure 3-9.-Drawing a circle in ink. circles. (See fig. 3-9, view A.) If the pen is not perpendicular to the paper, ink will not flow properly. To draw large circles, insert the extension bar in the pen or pencil leg, as shown in figure 3-9, view B. When the extension bar is used to draw large circles, the process of using the compass with only one hand becomes awkward. You should use both hands, as shown in figure 3-9, view B. |
 
|
|
|
||