Custom Search
|
|
  |
|
|
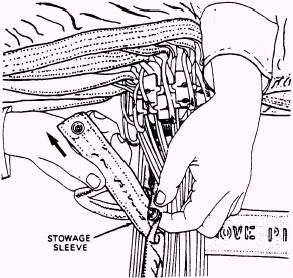
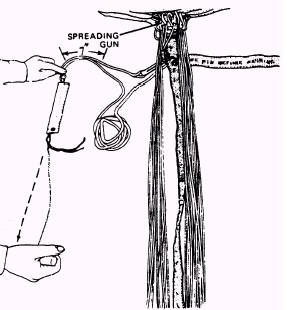
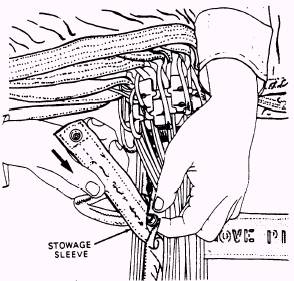
STOWAGE OF FIRING LANYARD INTO EXTRACTOR SLEEVE In stowing the firing lanyard into the extractor sleeve, you must first remember not to remove the spreading gun safety pin at any time during this procedure. Now you open the extractor sleeve fasteners on each side of the spreading gun safety pin; release the fastener holding the stowage sleeve to the extractor sleeve; and remove the stowage sleeve from the extractor sleeve, as shown in sewn loop and the stowage sleeve. Form a bight the length of the stowage sleeve in the firing lanyard, and by using the Type I cord and a bodkin, pull the firing lanyard into the stowage sleeve, stopping at the bottom of the sleeve. (See figures 3-18 and 3-19).
Figure 3-15.-Straightening canopy gores.
Figure 3-16.-Removing stowage sleeve.
Figure 3-18.-Stowage sleeve and firing lanyard.
Figure 3-17.-Inspecting firing lanyard.
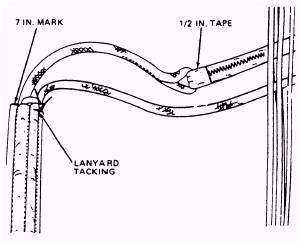
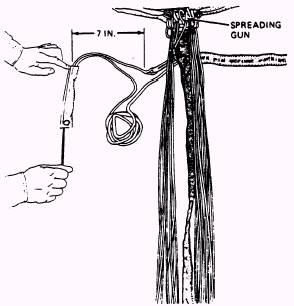
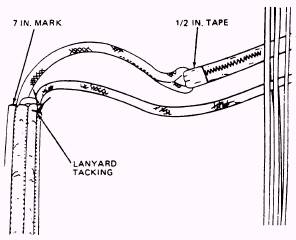
Figure 3-16. Inspect the firing lanyard for proper stowage, as shown in figure 3-17. In this inspection you may find that the firing lanyard has been pulled out of the stowage sleeve, or it may have been improperly stowed. To restow the firng lanyard, cut a piece of Type I nylon cord 30 inches long. This will aid you in stowing the lanyard. Measure 7 inches from the sewn loop at the top of the firing lanyard and make a mark. This mark will leave you 7 inches of slack between the
Figure 3-19.-Stowing firing lanyard.
Figure 3-20.-Lanyard tacking.
Figure 3-21.-Inserting stowage sleeve. Slowly remove the Type I line from the firing lanyard bight. Rapid removal of the Type I line from a firing lanyard bight could damage the lanyard. Form and stow an 8-inch bight of firing lanyard in the remaining stowage sleeve channel in the same manner. Tack the second lanyard bight to the stowage sleeve with one turn of waxed size A nylon thread, single. Tie the ends with a surgeon's knot followed by a square knot (fig. 3-20). Insert the stowage sleeve into the extractor sleeve, open end first (fig. 3-21). Engage the fastener on the stowage sleeve to the fastener on the extractor sleeve. Engage the extractor sleeve fasteners on each side of the safety pin (fig. 3-22).
|
 |